The Bench
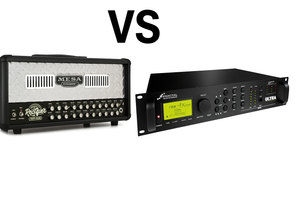
Amp Modelers vs. Tube Amps: Is the Future Digital or Still Glowing?
Amp Modelers vs. Tube Amps: Is the Future Digital or Still Glowing?
The world of guitar gear has never been more exciting—or more divisive. At the center of one of the hottest debates in modern guitar circles: amp modelers vs. traditional tube amps. Whether you're a bedroom player, gigging musician, or studio junkie, you've probably heard names like Kemper, Fractal Audio (Axe-Fx), or Line 6 Helix thrown around as the future of guitar tone.
But are digital modelers really better than old-school tube amps? Are tube amps becoming dinosaurs in a world of digital convenience? Let’s break it down.
What Are Amp Modelers?
Amp modelers are basically high-tech tone machines. Devices like the Kemper Profiler, Fractal Axe-Fx III, and Line 6 Helix digitally simulate the sound of real amps, speaker cabinets, and effects pedals. Instead of lugging around five amps and a suitcase of pedals, you get all of it in one box. Some modelers, like Kemper, use profiling (think: audio snapshots of real amps), while others use software modeling to recreate the tone from scratch.
The Case for Tube Amps
Tube amps have been the gold standard for decades—and for good reason.
Pros:
-
Warm, organic tone that reacts to your playing like a living thing.
-
Dynamic feel—the harder you dig in, the more it roars.
-
Simplicity—plug in and go. No menu-diving or firmware updates.
Cons:
-
Heavy and fragile—nobody loves hauling a 50lb combo up stairs.
-
Maintenance required—tubes wear out, need biasing, and can fail mid-gig.
-
Expensive—want multiple tones? You’ll need multiple amps.
Why Amp Modelers Are Taking Over
Modelers have gotten really good. Like scary good. For many players, they’ve reached the point where they’re almost indistinguishable from the real thing—especially in a mix or live situation.
Pros:
-
Insane versatility—hundreds of amp models, cabinets, and effects in one device.
-
Lightweight and portable—fits in a backpack.
-
Silent recording and direct gigging—no mic required.
-
Consistent tone—no matter the volume or room acoustics.
Cons:
-
Learning curve—menus, patches, updates. It can feel more like a computer than a guitar rig.
-
Tone purists may still feel something’s missing—some argue the "feel" isn’t quite the same.
-
Dependent on software and power—if it glitches, you’re stuck.
Are Tube Amps Going Extinct?
Here’s the truth: tube amps aren’t dead, but they are evolving into a niche.
Digital rigs are exploding in popularity. Worship bands, touring pros, and even major recording artists are going digital for the convenience and reliability. According to a 2023 Guitar World article, digital amp and effects sales have surged, while tube amp sales have seen a modest decline.
But there’s still a big audience for tube amps—especially among tone chasers, studio owners, and blues/rock purists. Boutique builders are still thriving, and legends like Fender, Vox, and Marshall aren’t slowing down.
In short: tube amps are becoming more of a “craft” item, while digital gear is becoming the everyday workhorse.
So Which One Should You Use?
It depends on what you value.
-
Love pure, raw tone and simplicity? Tube amps all day.
-
Need versatility, portability, and consistency? Get a modeler.
There’s no right or wrong—just the right tool for your job. And in 2025, it’s never been easier to have both. Some players even run modelers through a tube power amp to get the best of both worlds.
Final Thoughts
Amp modelers are the future, but tube amps aren’t going anywhere. It’s not a war—it’s a toolbox. Whether you’re rocking a vintage Deluxe Reverb or a Helix preset called "Meaty 5150 Clone," what matters most is the music you make with it.
So don’t sweat the gear wars. Try both. Use what inspires you. And crank it—digital or not.
Active vs Passive Pickups?
Active vs. Passive Pickups: Exploring the Differences and Innovations
Guitar pickups are the unsung heroes of an electric guitar’s sound. They convert the vibrations of the strings into an electrical signal that can be amplified, shaping the tone and character of the instrument. Among the many different types of pickups, active and passive pickups stand out as two of the most prominent, each with unique characteristics and advantages. In this article, we will explore the differences between these two types of pickups, the role of active preamps, and take a look at some of the leading brands in the industry like Fishman, EMG, Seymour Duncan, and DiMarzio.
What Are Passive Pickups?
Passive pickups are the traditional choice for electric guitars, having been around since the invention of the electric guitar itself. These pickups do not require an external power source; instead, they generate a signal from the vibration of the guitar’s strings moving through a magnetic field created by a magnet and coil. The signal produced is relatively low in output and depends on the resistance of the coils and the type of magnet used.
The tone of passive pickups is generally characterized by warmth and natural dynamics. They allow for a more “organic” sound, with a broad frequency range that can capture subtle nuances of playing technique. Passive pickups typically have less output than their active counterparts and can sometimes sound darker or less defined, depending on the design.
What Are Active Pickups?
Active pickups, on the other hand, feature a built-in active preamp powered by a battery (usually 9V) that boosts the signal before it is sent to the amplifier. This preamp allows active pickups to produce a higher output, greater clarity, and a more pronounced signal. The added circuitry can also help reduce noise and interference, making active pickups a favorite for high-gain applications like metal and hard rock.
Because of the active preamp, these pickups have a more consistent sound regardless of the guitar’s volume knob settings. They also tend to offer more treble and tighter low-end, which can be particularly useful in achieving a punchy and precise sound. However, the tone of active pickups is often described as more “sterile” or “clinical” compared to passive pickups, with less of the natural warmth and dynamic response that passive pickups are known for.
A Brief History of Active Preamps
The introduction of active pickups and preamps in the electric guitar world began in the 1970s. The goal was to address the limitations of passive pickups, particularly in high-gain settings where passive pickups often struggled with noise and lack of clarity.
The first widely recognized active pickup system was developed by EMG, an American company founded in 1976. EMG introduced its EMG-81 in the early 1980s, a revolutionary active humbucker that was quieter, offered a higher output, and had more precise tone shaping than passive pickups. This pickup quickly gained popularity, especially with metal guitarists seeking a clearer, more powerful sound. The success of EMG paved the way for other brands to explore active pickups, pushing the boundaries of electric guitar tone.
In the 1990s, Fishman further developed the active pickup landscape with its Fluence series, which offered not only active preamps but also switchable voicings, providing players with multiple tonal options from a single set of pickups.
Leading Brands in Active and Passive Pickups
-
EMG: As pioneers of active pickups, EMG remains one of the leading names in the industry. Their active pickups, like the EMG 81 and EMG 60, are renowned for their clarity and high output, making them the go-to choice for many rock and metal players. EMG also offers a wide range of other models, including the EMG 85 and EMG Retro Active series, providing a diverse palette of tones to suit different musical genres.
-
Fishman: Known for innovation, Fishman’s Fluence line of active pickups has garnered attention for its unique ability to switch between different tonal voices. The Fluence Modern humbucker, for example, offers both a “crystal clear” modern tone and a “hot and aggressive” sound, giving guitarists versatility with just a flick of a switch. Fishman’s active pickups have become favorites among professional musicians in a variety of genres.
-
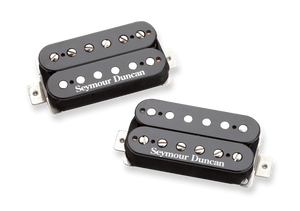
Seymour Duncan: A long-time leader in the pickup industry, Seymour Duncan offers both active and passive pickup options. Their Blackouts active humbuckers are a direct competitor to EMG’s offerings, delivering high-output tones with less noise. Duncan’s extensive selection also includes popular passive pickups like the SH-1 ‘59 and SH-5 Duncan Custom, making the brand a go-to for players seeking both traditional and modern sounds.
-
DiMarzio: Known for its extensive range of passive pickups, DiMarzio has also ventured into the active pickup world. The DiMarzio Super Distortion and DP100 are classics in the passive realm, providing fat and powerful tones. For active pickups, DiMarzio introduced the D Activator series, which offers the output and noise-reduction benefits of active pickups while still maintaining some of the warmth and dynamics of passive designs.
Which Pickup is Right for You?
The choice between active and passive pickups ultimately depends on your musical style and tonal preferences. If you’re a player who wants a broad, organic sound with a bit of warmth, passive pickups are an excellent choice. Their dynamic response to playing style and ability to “breathe” with subtle nuances make them ideal for genres like blues, jazz, and classic rock.
On the other hand, if you’re seeking high-output, clarity, and the ability to cut through a dense mix, active pickups might be a better fit. Their noise-canceling features and boosted output make them perfect for aggressive styles like metal, where precision and high-gain performance are essential.
Conclusion
Both active and passive pickups have their place in the world of electric guitars, and many musicians end up using both depending on the genre or performance context. While EMG helped pioneer active pickups in the '70s, Fishman, Seymour Duncan, and DiMarzio have continued to innovate, creating pickups that cater to all types of players. Whether you prefer the raw, natural tone of passive pickups or the powerful, pristine clarity of active pickups, there’s a pickup out there that can help you achieve your ideal sound.
Understanding the Floyd Rose Tremolo: Setup, Tuning, and Optimization
Understanding the Floyd Rose Tremolo: Setup, Tuning, and Optimization
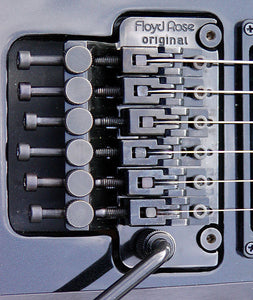
The Floyd Rose tremolo system is one of the most versatile and expressive guitar bridges ever designed, offering incredible tuning stability even under extreme whammy bar abuse. However, to get the most out of it, you need to understand how factors like string gauge, tuning stability, and bridge setup affect its performance.
1. String Gauge Matters
The string gauge you use plays a crucial role in how the Floyd Rose responds.
- Lighter gauge strings (e.g., 9-42, 9-46): Easier for bends and dive bombs but may feel too loose in lower tunings.
- Heavier gauge strings (e.g., 10-52, 11-56): Provide more tension, great for lower tunings, but require stronger springs to balance the bridge.
- Hybrid sets (e.g., 9-46 or 10-52): Offer a balanced feel between high and low strings, making them ideal for mixed playing styles.
If you change string gauge, you will need to adjust the bridge tension using the springs in the back cavity.
2. Choosing the Right Tuning
- Floyd Rose systems are typically set up for a specific tuning. Dropping to a lower tuning without adjusting the springs will cause the bridge to tilt forward.
- Standard E and Eb are common for most setups.
- Drop tunings (Drop D, Drop C, etc.) require careful balancing of the tension or the use of a D-Tuna (for standard-to-Drop-D switching on non-recessed bridges).
- If you use lower tunings frequently, consider a heavier string gauge and extra tension springs to maintain proper float and stability.
3. Recessed vs. Non-Recessed Floyd Rose
There are two main styles of Floyd Rose installation:
-
Recessed Floyd Rose:
- Sits lower in the body, allowing for both pull-ups and dive bombs.
- Requires precise balance to keep it floating level.
- More challenging to set up and maintain due to its sensitivity.
-
Flat-Mounted Floyd Rose:
- Sits flush against the guitar body, limiting upward movement.
- Generally more stable and easier to re-tune.
- Works well with a D-Tuna for quick drop tuning changes.
4. Spring Setup & Fine-Tuning Stability
- Most Floyd Rose systems use 3-5 springs in the back cavity, depending on string tension.
- Tighter spring tension keeps the bridge more stable but makes the bar stiffer.
- Looser spring tension allows for easier bar movement but can lead to tuning instability.
- Consider noiseless springs to reduce unwanted vibrations.
Final Thoughts
The Floyd Rose is an amazing tool for lead players, shredders, and dive bomb enthusiasts, but setup is everything. Whether you're going for crazy whammy bar tricks or stable tuning in drop tunings, getting the right balance between string gauge, spring tension, and bridge positioning is key.
Having issues getting yours set up perfectly? Feel free to reach out to us!
I want to use a different tuning. What gauge should I use?
Recommended String Gauges for Different Tunings
The string gauge you choose becomes even more important when tuning your guitar to alternate or lower tunings, as the tension on the strings changes significantly. Whether you're tuning to a half-step down for a subtle shift in tone or all the way down to Drop B for heavy, menacing riffs, selecting the right string gauge will ensure that you get the best performance in terms of both tone and playability.
Below are some common tunings and the recommended string gauges to go with them, keeping in mind how they interact with high-gain amplifiers for optimal tone and tuning stability.
1. Standard Tuning (E A D G B e)
- Recommended Gauge: .009–.042 or .010–.046
In standard tuning, lighter string gauges like .009–.042 are common, especially for players who prioritize fast playing and bending. They provide a bright, snappy tone, and are easy on the fingers. If you prefer a bit more stability and a thicker tone, a slightly heavier gauge like .010–.046 is ideal.
2. Half-Step Down (Eb Ab Db Gb Bb eb)
- Recommended Gauge: .010–.046 or .010–.052
When tuning a half-step down, you’re essentially lowering your pitch slightly, which can result in a warmer tone. Lighter gauges like .010–.046 work well, providing enough tension to keep the strings tight while maintaining the tone's brightness. If you want a deeper sound and more stable tuning, a heavier gauge like .010–.052 may be better for added fullness and sustain.
3. Drop D (D A D G B e)
- Recommended Gauge: .010–.046 or .011–.048
Drop D tuning drops the low E string to D, which can lead to a looser feel with lighter gauges. A .010–.046 set is common for this tuning as it provides a good balance of comfort and tone. However, if you like a bit more tension and depth in the low end for heavier riffs, upgrading to a .011–.048 set will give you better control and sustain, especially when playing with high gain.
4. Drop C (C G C F A D)
- Recommended Gauge: .011–.052 or .012–.056
For Drop C tuning, where you tune two whole steps down from standard E, you'll want a heavier string gauge to maintain proper tension and ensure that the strings feel tight enough for playability. A .011–.052 gauge will provide a solid, controlled tone, giving you enough tension in the lower registers for clear note articulation and sustain. If you prefer a beefier sound and more stability in your tuning, a .012–.056 set would provide extra mass and tension for the heavier sound required in genres like metal or hardcore.
5. Drop B (B F# B E G# C#)
- Recommended Gauge: .012–.056 or .013–.062
Drop B tuning is very popular in heavier styles like metalcore and death metal. To maintain clarity and avoid floppiness in the low end, you'll need a heavy gauge string set. A .012–.056 gauge is the standard recommendation for Drop B, giving you solid tension without compromising on tone. For players who tune even lower or prefer a tighter feel, a .013–.062 set is ideal, providing enough tension to keep the strings firm and the tone thick and defined.
6. Drop A (A E A D F# B)
- Recommended Gauge: .013–.062 or .014–.068
In Drop A tuning, where you're tuning down a full step from Drop B, you'll want a heavier string gauge to ensure the strings don’t feel too loose or floppy. A .013–.062 gauge is often the best choice for this tuning, as it provides sufficient tension for clear articulation in the lower frequencies while allowing for some flexibility when bending strings. For players who want even more control and stability, a .014–.068 set offers the tension needed to maintain proper tuning stability, especially during aggressive playing.
7. Drop A# (A# F A# D# G A D)
- Recommended Gauge: .014–.068 or .015–.070
Similar to Drop A, Drop A# requires heavy strings for optimal tension, but since the tuning is even lower, the strings need to be even thicker to avoid them feeling too loose. A .014–.068 set will provide a tight feel and maintain good tuning stability. If you're playing even lower tunings or prefer extra stiffness in the strings, a .015–.070 set will give you the extra mass and tension required for heavy riffs and sustained notes without losing clarity.
8. C Standard (C F A# D# G C F)
- Recommended Gauge: .012–.056 or .013–.060
In C Standard tuning, you drop the entire guitar down two whole steps from standard tuning. You’ll need strings with enough thickness to maintain a tight feel and proper tension. A .012–.056 set is a good starting point for most players, providing a balance between tension and playability. If you’re looking for more low-end response and a beefier tone, consider a .013–.060 set for added warmth, sustain, and low-end presence.
9. B Standard (B E A D F# B)
- Recommended Gauge: .013–.062 or .014–.070
B Standard tuning is common for extremely heavy styles such as doom metal or deathcore. To avoid floppiness and ensure clear note articulation, heavier gauge strings are essential. A .013–.062 gauge provides enough mass and tension for the lower tunings, delivering tight, full, and articulate notes with good sustain. If you want even more stability and extra power in your sound, a .014–.070 set is the best choice for maintaining definition in the low-end and keeping the strings under tension during aggressive playing.
10. Drop G (G D G C F A D)
- Recommended Gauge: .014–.070 or .015–.072
Drop G tuning, used primarily in extremely heavy genres, requires very thick strings due to the extreme drop. A .014–.070 set will provide enough mass and tension for clear note articulation and tuning stability at this extreme low register. If you prefer even more control and the ability to crank up your gain, a .015–.072 set will offer maximum tension, keeping the low-end tight and defined while preventing the strings from feeling too loose.
General Tips for Choosing String Gauge in Alternative Tunings
-
Tighter Tension: When tuning down to lower tunings (e.g., Drop C, Drop B, Drop A), heavier gauges prevent the strings from feeling too loose, keeping them firm for clearer tone and better articulation, especially when using high-gain amps.
-
Low-End Clarity: Lower tunings, especially in genres like metal and doom, often require strings with good low-end presence to ensure the notes don’t become muddy. Heavier gauge strings help produce clear, defined lows, making your riffs and chugs stand out.
-
Playability vs. Tone: Lighter gauge strings offer easier playability and faster bends, but they may not hold up well under low tunings or aggressive playstyles. Heavier gauges, though harder to play, produce a fuller, richer tone and are ideal for heavy, down-tuned riffs.
-
Consider Your Playing Style: If you’re doing a lot of lead playing or fast solos, you may want a lighter gauge for speed and bendability. For rhythm and chugging, heavier gauges provide more stability and punch.
Conclusion
Choosing the right string gauge for your guitar's tuning is crucial for getting the best performance out of your instrument, especially in high-gain situations. Lighter gauges provide ease of playability but may lack the tightness and clarity needed for low tunings and aggressive playing. Heavier gauges, on the other hand, give you more stability, power, and tonal depth, making them perfect for lower tunings and genres that demand precision and power.
By selecting the appropriate string gauge for your preferred tuning, you can ensure that your guitar responds well under high gain, maintains tuning stability, and delivers the tone you’re looking for.
Fret sprout? What the hell is it??
Understanding Fret Sprout on Guitars and How to Prevent & Remedy It
If you’re a guitar player, you may have encountered an issue that can affect both your playing comfort and the lifespan of your instrument: fret sprout. While this problem might not be immediately apparent, it can become increasingly noticeable over time, leading to a less enjoyable playing experience. Whether you’re a beginner or a seasoned player, understanding fret sprout and knowing how to prevent or remedy it can ensure that your guitar stays in top condition for years to come.
What is Fret Sprout?
Fret sprout occurs when the metal frets of your guitar protrude from the edges of the fretboard, often becoming sharp or uneven. This happens when the wood of the fretboard contracts due to changes in temperature and humidity, which leaves the frets exposed. Fret sprout is particularly common in climates with fluctuating seasonal conditions, as wood naturally expands and contracts based on moisture levels in the air.
When the frets stick out, they can be uncomfortable to play, especially for fingerstyle players who might experience sharp edges digging into their hands. Not only can this cause discomfort, but it can also affect your guitar’s tone and playability if left unaddressed.
Why Does Fret Sprout Happen?
Fret sprout is often linked to environmental factors like temperature and humidity changes. Wood, being a natural material, is highly sensitive to its surroundings. When a guitar is exposed to dry or excessively humid conditions, the fretboard wood will either shrink or swell. In turn, this causes the frets to stick out beyond the surface of the fretboard, which is particularly noticeable in colder, drier months.
Other factors contributing to fret sprout include:
-
Dry air: Excessively dry environments, such as heated rooms during winter, can cause wood to shrink and the frets to protrude.
-
High humidity: On the other hand, high humidity can cause the wood to expand, which can also lead to fret sprout.
-
Improper storage: If a guitar is left in extreme conditions (e.g., near a heater or in a damp basement), this may accelerate the issue.
How to Remedy Fret Sprout
If you’ve noticed fret sprout on your guitar, don't panic—it can be fixed! Here’s how to go about addressing the issue:
1. Trimming the Frets
A professional guitar technician or luthier can trim or file down the protruding frets to remove the sharp edges. This process requires precision and experience to avoid damaging the fretboard or the frets themselves. It’s important to leave this task to the professionals if you're unsure about doing it yourself.
2. Fretboard Dressing
Once the frets are trimmed, the fretboard may need a proper dressing, which involves smoothing out any rough spots and re-shaping the frets. This process helps restore your guitar’s playability and ensures that the frets are level.
3. Rounding Off the Edges
In some cases, the edges of the frets may need to be rounded off to avoid discomfort when playing. A luthier can do this by carefully filing the edges of the frets until they are smooth and comfortable for the player’s hand.
4. Conditioning the Fretboard
One of the best ways to prevent fret sprout is to take proactive care of your fretboard, and conditioning the wood plays a crucial role. When the fretboard is conditioned properly, it’s less likely to contract and expand drastically, which means less risk of fret sprout. Here's how to do it:
Conditioning the Fretboard
Conditioning your fretboard is an essential part of routine guitar maintenance. A well-maintained fretboard will be more resistant to changes in humidity, making fret sprout less likely to occur. Here’s how to condition your fretboard and keep it in top shape:
-
Choose the Right Fretboard Oil or Conditioner: Depending on the wood of your guitar's fretboard, you may want to use a specific type of fretboard oil or conditioner. For example, rosewood and ebony fretboards benefit from oils that nourish and protect the wood, while maple fretboards generally don’t need oil, as they are typically sealed.
-
Clean the Fretboard: Before applying any oil or conditioner, clean your fretboard to remove grime, dust, and old conditioner. Use a soft cloth and a gentle fretboard cleaner to wipe down the wood.
-
Apply Conditioner Sparingly: Apply a small amount of fretboard conditioner to a clean, lint-free cloth, and rub it into the wood. Make sure to spread the oil evenly and avoid over-applying, as excess conditioner can leave a residue.
-
Allow It to Absorb: Let the conditioner sit for a few minutes to allow the wood to absorb it. Wipe off any excess oil with a clean cloth to avoid leaving the fretboard too greasy.
-
Don’t Forget the Frets: While conditioning the fretboard, make sure to avoid getting oil on the frets themselves. It’s best to keep the oil limited to the wood, as excess oil on metal frets can cause corrosion over time.
5. Proper Storage
Once your guitar is conditioned and in good shape, the way you store it can play a big role in preventing fret sprout in the future. Use a humidifier to maintain consistent humidity levels in your home, especially during dry seasons. If you live in an area with extreme temperature changes, consider using a guitar case humidifier to maintain a balanced moisture level around your instrument.
Additionally, avoid storing your guitar in places with drastic temperature fluctuations, such as next to heaters or in cold basements.
How to Prevent Fret Sprout
Preventing fret sprout is all about proper maintenance and storing your guitar in a stable environment. Here are some tips to keep fret sprout from happening:
-
Control Humidity: Maintain a stable humidity level (around 40-50%) where you store your guitar. Use a room humidifier or invest in a guitar case humidifier to control moisture levels.
-
Use a Guitar Stand or Wall Hanger: Avoid leaning your guitar against walls or placing it in areas where extreme temperature changes occur. A stable, climate-controlled environment is best for your guitar.
-
Store in a Proper Case: When not in use, store your guitar in its case, especially during seasons of high humidity or dry conditions. A case helps protect your guitar from the elements.
-
Regularly Condition the Fretboard: As mentioned earlier, conditioning your fretboard regularly helps prevent the wood from drying out and expanding. A well-conditioned fretboard remains more stable, preventing issues like fret sprout.
Conclusion
Fret sprout can be a frustrating issue, but with proper care, it can be avoided or fixed. By maintaining a stable environment for your guitar, conditioning the fretboard regularly, and addressing any fret sprout promptly, you can keep your instrument playing comfortably and sounding great for years to come. Whether you’re taking care of a vintage piece or a brand-new axe, a little attention goes a long way toward ensuring your guitar remains in top shape.
If you do notice fret sprout on your guitar, don’t hesitate to reach out so we can remedy the situation. With the right steps, you can enjoy a smooth playing experience free of discomfort and fretboard issues. Happy playing!

